Web Accessibility compliance has become a “must” in today’s world, not only to serve your visitors but also to avoid expensive litigation by accessibility trolls.
The Divi Theme/Builder is one of the most popular WordPress frameworks out there, yet, out of the box, it is not accessible, unfortunately.
In this article, I’ll give you some ways to drastically improve the accessibility of the Divi Theme and Builder. These don’t guarantee 100% accessibility compliance but will go a long way to make your site usable to visitors with impairments and to help you avoid expensive fines and litigation. Using these techniques, I am routinely able to produce Divi sites with zero errors and zero contrast violations in the WAVE accessibility checker.
1. Install the Divi Accessibility Plugin
This plugin makes a variety of accessibility improvements, including improving menu accessibility, keyboard navigation, and more. It’s a no-brainer to install and improve your site’s accessibility with almost no work.
You can also have it underline links, however, you may need to add some CSS to undo underlining where not needed, such as with the Divi Slider Module nav arrows (which I do in my Divi Slider CSS code below).
This plugin is not available in the WP repo. Be sure to use this version in Github, and NOT the paid version in the Divi Marketplace.
2. Improve Your Divi Slider Module Navigation and Contrast with This CSS
The Divi Slider Module has a few major accessibility problems. The nav controls may have poor contrast against the background, and they are not keyboard-navigable (at least, you don’t get any visual feedback of what item you’re on).
I have a separate article that provides the CSS to fix these problems:
Just note that these fixes don’t make the slider 100% accessible. A truly accessible slider would need a way to stop the slide show using keyboard controls, for example. Stopping on hover is not an accessible solution.
But, the improvements make it a lot better than before.
3. Add Links to Parent Menu Items with Dropdowns
If your main Divi menu has sub-menu items and the parent menu item has no link, you won’t be able to navigate to the sub-menu items using a keyboard (give it a try sometime).
The solution is to add a link to all parent menu items. What I do is use the same link as the first sub-menu item.
This isn’t a perfect solution, as you now have two links going to the same destination, but it cures what certainly would be a huge red flag for accessibility trolls, as well as a huge inconvenience for anyone using the keyboard to navigate your site.
4. Make the Hamburger Menu Visible When Navigating to It Using Keyboard (Slideout Menu)
When using the slideout menu on one of my Divi sites, the hamburger icon outline wouldn’t show up when navigating to it using the tab key. This CSS forces the outline color:
span.et_pb_header_toggle:focus {
	outline: 2px solid white;
}
You may need to change the color depending on your site.
5. Fix Slideout Menu Keyboard Nav Order
If you are using the Divi slideout menu, you’ll find a couple problems when navigating using the keyboard. First, the hidden menu items are reachable using the tab key when you first go to the site. This is because a “display:none” is missing when the page first loads. To fix that, just add this CSS:
/* START OUT WITH SIDE MENU HIDDEN TO PREVENT TABBING THROUGH IT */
.et_slide_in_menu_container {
	display: none;
}
That way, the invisible menu items won’t be reachable when the menu is closed when you first land on the site.
The second problem you’ll notice is that when the menu is open, the keyboard navigation order is wrong; that is, when you open the menu, the next thing isn’t the contents of the menu, but rather the rest of the page. You have to go through every page link to get to the open menu items. That’s because they are in the wrong order in the code.
To fix that, add this jQuery code which swaps the order of the menu and the header containing the hamburger button:
/* CHANGE ORDER OF HEADER AND HAMBURGER BUTTON FOR CORRECT TAB-KEY ORDER FOR ACCESSIBILITY */
jQuery(".et_slide_in_menu_container").insertAfter("#main-header");
6. Divi Blurb Module Fixes
Pretty much every Divi Module allows you to add a link to that module in the “Module Link URL” field, making the whole module clickable. Unfortunately, that module link can’t be reached by keyboard navigation, a big accessibility “no-no”.
The workaround is to add a true link somewhere inside the module. For example, if you want a Blurb Module to be clickable with a link, also add that link to the title of the module so that keyboard users can navigate to that to follow the link.
Another problem with the Blurb module is that when the image is linked, there is no outline when you tab over it. Use this CSS to fix that problem:
/* TAB OUTLINE ON BLURB LINKS */
.et_pb_blurb a.keyboard-outline {
	display: inline-block;
}
7. Change Footer Header Tags to Fix Header Hierarchy
The Accessibility guidelines state that header levels can’t jump by more than one. For example, you can’t have an h4 tag after an h2 tag.
Yet, that’s exactly what might happen with the default Divi footer, since it uses h4 tags for footer widget headers.
Luckily, there is some code provided by Intelliwolf to fix that, which I am copying here (this code changes the footer header tags to h2 ):
// -----------------------------------------------------------
// CHANGE FOOTER HEADINGS TO H2 TAGS FOR ACCESSIBILITY COMPLIANCE
// https://www.intelliwolf.com/change-divi-footer-widget-title-heading-levels/
// -----------------------------------------------------------
add_action ('widgets_init', 'iw_modify_footer', 100);

function iw_modify_footer() {
  global $wp_registered_sidebars;
  $before = "<h2 class='widgettitle'>";
  $after = "</h2>";

  $wp_registered_sidebars['sidebar-2']['before_title'] = $before;
  $wp_registered_sidebars['sidebar-3']['before_title'] = $before;
  $wp_registered_sidebars['sidebar-4']['before_title'] = $before;
  $wp_registered_sidebars['sidebar-5']['before_title'] = $before;
  $wp_registered_sidebars['sidebar-6']['before_title'] = $before;

  $wp_registered_sidebars['sidebar-2']['after_title'] = $after;
  $wp_registered_sidebars['sidebar-3']['after_title'] = $after;
  $wp_registered_sidebars['sidebar-4']['after_title'] = $after;
  $wp_registered_sidebars['sidebar-5']['after_title'] = $after;
  $wp_registered_sidebars['sidebar-6']['after_title'] = $after;

  return true;
}
Of course, you should manually fix any other header hierarchy problems in the body of your pages.
8. Add This aria-label to Fix Empty Video Play Button (WAVE Error)
The Divi Video module play button is an empty anchor tag, which causes a WAVE error. Add this JS code in your Divi Theme Options -> Integration -> Add code to body area to fix that.
// ADD TEXT TO DIVI VIDEO PLAY BUTTONS TO MAKE WAVE TEST PASS
jQuery( document ).ready( function() {
	jQuery('.et_pb_video_play').attr( 'aria-label', 'Play Video' );
	} );
9. Install the WAVE Browser Extension to Find Color Contrast Violations
Color contrast violations are a huge red flag when it comes to accessibility, especially since these are easy to find using automated tools, and thus make you a juicy target for unscrupulous lawyers.
The Divi Accessibility has a built-in tool that you can use to flag these violations, but I like to use the WAVE Chrome browser extension since that is what I’ve seen some accessibility trolls use to shakedown website owners.
Install the tool, then use it to find your color contrast errors and fix them.
10. Download the Colour Contrast Analyzer to Find Accessible Color Combinations
OK, so you’ve found your color contrast violations. How do you know what colors to use to fix these?
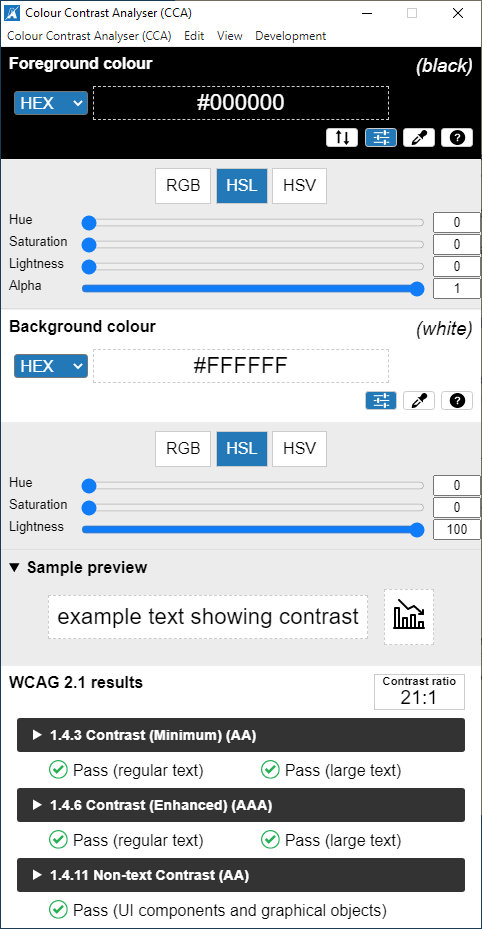
I like to use the Colour Contrast Analyser from The Paciello Group, a respected member of the accessibility community. It’s available for Windows and Mac:
To use it, click the dropper icons to pick the foreground and background colors. Then, click the HSL button to view Hue, Saturation, Lightness, and Alpha and tweak those (usually lightness) until the colors are compliant.
11 Add Alt Text to Images
Another huge red flag for accessibility is not having alt text on images. Note that Divi will use the existing alt text attached to images in the Media Library when you add new Image Modules. But, it won’t add alt text to existing Divi Image Modules if you add alt text in the Media Library later. Unfortunately, you’ll have to go through and add the alt text manually to any Divi Image Modules without alt text (in the Advanced tab under Attributes).
12. Add Ability to Navigate to Non-Anchor Tags
Use the tab key to make sure you can land on and select each link and control on your website. If you’ve installed the Divi Accessibility plugin and done the previous steps on this list, you should be pretty well covered for anchor tags. But, there may be non-anchor tag elements (usually controls) that require the ability to navigate to and trigger them. If so, I’ve written an article on how to make any HTML element selectable using a keyboard by adding some code. Check it out here:
13. Add Keyboard Nav Outlines If Needed
The Divi Accessibility plugin does a pretty good job of adding outlines to elements when you tab to them. But if there are some stubborn links that it doesn’t cover (or if you just don’t want to use that plugin), you can try adding this CSS:
:focus-visible {
outline-style: solid!important;
    outline-width: 2px!important;
    -webkit-transition: none!important;
    transition: none!important;
    border: 2px solid limegreen !important;
}
14. Add Contrasting Background Color When Using Text Over Images
Another source of WAVE errors is when you have text over images; for example, in a Divi Slider Module. To eliminate these errors, add a contrasting background color to the slider, even though that background won’t be visible.
For example, if you have white text over an image in a slider, make the background of that slider black. That will eliminate any WAVE contrast errors associated with that slide. It’s up to you, however, to make sure the contrast of the text over the image has sufficient contrast. I don’t know of an automated way to do that.
15. Change the Background Color in the Customizer
Another invisible WAVE error can sometimes occur with the skip link color contrast. This is another false positive situation. To fix this, try changing the background color of your site to white in the Customizer. If that doesn’t work, try black.
16. Add Background Color with Low Opacity to Fix WAVE Contrast Errors
There are times when you have elements (especially those that overlap other elements) causing contrast WAVE errors that are false errors.
If you’re not able to add a solid background color to fix these because doing so would be aesthetically ugly, then you can use this trick. Basically, WAVE looks at the background color, but not opacity. So, if you need to add a black background behind something for example, but can’t do so for aesthetic reasons, add a translucent background instead like this:
background-color: rgba( 0,0,0,0.01 );WAVE will see that as a black background and the contrast tests will pass. If you need white, use 255 of course.
17. Fix Invisible WAVE Errors in the Divi Social Media Module
I noticed that the Divi Social Media Module would cause errors in the WAVE Chrome browser accessibility extension due to a contrast violation with some invisible screen reader text. This is a “false positive” that probably wouldn’t impact a real user, but it could help make your site a target for accessibility trolls, so it’s worth fixing.
If you encounter this error, add this CSS to your site:
/* ================================
   FIX INVISIBLE SOCIAL ICON CONTRAST ERRORS
   ================================ */
.et_pb_social_media_follow_network_name,
.et_pb_search .screen-reader-text {
	color: black;
	background-color: white;
}

/* DON'T UNDERLINE THESE LINKS */
#et-main-area .et_pb_social_media_follow a.icon {
    text-decoration: none;
}
Note, I also added a line to disable underlining of these links if you’ve enabled that in the Divi Accessibility plugin.
18. Fix Social Sharing Buttons in Monarch Plugin
If you use the Elegant Themes Monarch plugin and you don’t see outlines when using the tab key to navigate to them, add this CSS to your site:
.et_social_networks a.et_social_share:focus {
    border: 1px solid black;
}
If you’re getting WAVE errors on your Monarch buttons because they contain no descriptive text, you can add the labels using Monarch settings. If you want a clean look without the social network names being displayed, you can use this fix, which adds aria-labels to the social sharing buttons (and eliminates those WAVE tester errors).
Add this JS code wherever you add JS to your site (child theme, code plugin, Divi Integration box, etc.):
<script>
        document.addEventListener("DOMContentLoaded", function(event) {
            // ADD ARIA LABELS TO MONARCH BUTTONS
            jQuery('[data-social_name="facebook"').attr("aria-label", "Facebook");
            jQuery('[data-social_name="twitter"').attr("aria-label", "Twitter")
            jQuery('[data-social_name="linkedin"').attr("aria-label", "Linked In");
            jQuery('[data-social_name="gmail"').attr("aria-label", "Gmail");
        });
    </script>
If you’re using a social network not listed here, use your browser’s inspector to get the social_name and add to this list.
19. Update Your Plugins and Complain About Non-Compliant Plugins
I’m a satisfied user of the Fluent Forms plugin, but for a long time, they had unfixable accessibility errors in their forms. But they just recently fixed these errors in an update, probably due to user feedback.
So, this is yet another reason to keep your plugins updated. If a plugin is causing accessibility errors, please suggest fixes to the plugin maker.
20. Check This List
These are some ways to fix the most glaring accessibility problems with Divi, but there are probably additional issues depending on your site. To go further, check out my web accessibility checklist:
Conclusion
Using these techniques, I am routinely able to produce Divi websites that have zero errors and zero contrast violations in the WAVE accessibility checker. While that won’t guarantee 100% accessibility compliance or that you won’t get sued by an accessibility troll, it will help you sleep better at night and provide piece of mind that you’ve made real improvements in your site’s accessibility.

I am a freelance web developer and consultant based in Santa Monica, CA. I’ve been designing websites using WordPress and from scratch using HTML, CSS, PHP, and JavaScript since 2010. I create websites and web applications for businesses, nonprofits, and other organizations. I have a degree in Electrical Engineering (BSEE) from California Institute of Technology and a degree in Engineering Management (MSEM) from Stanford University.
Please Leave a Question or Comment
This is all good information, however this tutorial page has several accessibility errors per the testing tool you recommend.
[…] For more information on web accessibility, see my accessibility checklist. If you’re a Divi user, check out my tips to make the Divi theme accessible. […]