For the life of me, I wasn’t able to find a pre-made Gutenberg block for making checklists. I’ve had more than a few occasions for clients and for my own sites, where I’ve wanted to embed a checklist into WordPress. Usually, I ended up doing it in raw HTML. Not ideal for clients.
So, I decided how to make my own Gutenberg checklist block with the help of the Lazy Blocks plugin. This wonderful plugin helps you make your own Gutenberg blocks using a simple editor plus some PHP code (no React!)
The Finished Product
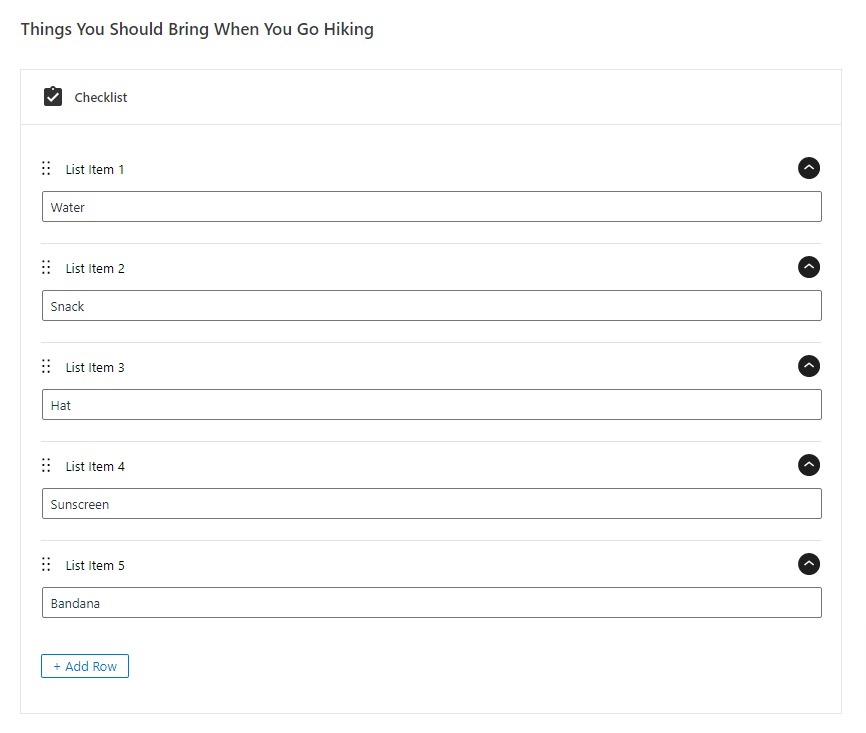
Here’s a sample of the result (try clicking the items):
Things You Should Bring When You Go Hiking
Here’s what that looks like in the Gutenberg editor:
If this looks like something you’d like to have on a WordPress page, keep reading! Note, this solution doesn’t have any local storage; the assumption is that the user will use this checklist while they view the page this one time and not need it a week later. So it’s more for things like a shopping list rather than a “to do” list.
Setting Up the Gutenberg Block
I’m using the excellent (but somewhat badly named) Lazy Blocks plugin to easily create the checklist Gutenberg block.
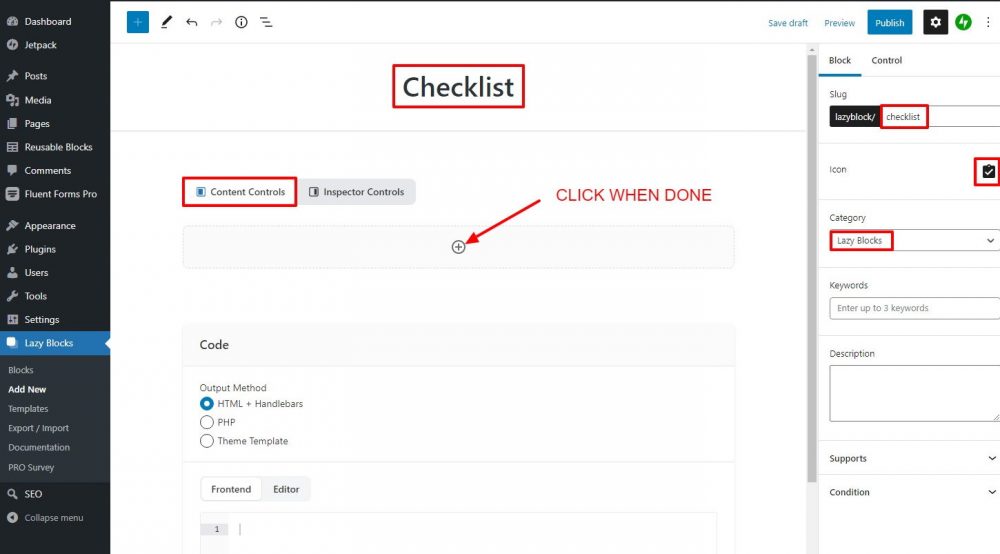
First, install and activate Lazy Blocks. Then create a new block by going to Lazy Blocks -> Add New. Next, follow these steps:
- Enter “Checklist” for the Block Name at the top of the editor.
- In the right sidebar, enter “checklist” for the Slug.
- Below that, for the icon, choose the clipboard with the check mark.
- Below that, select “Lazy Blocks” for the Category.
- Below that, you can enter a brief Description if you wish (optional).
- Select “Content Controls” instead of “Inspector Controls” in the selector. That makes the controls for this block appear in the content area of the editor instead of the sidebar.
- Click on the plus sign to create your first control.
Creating the Repeater
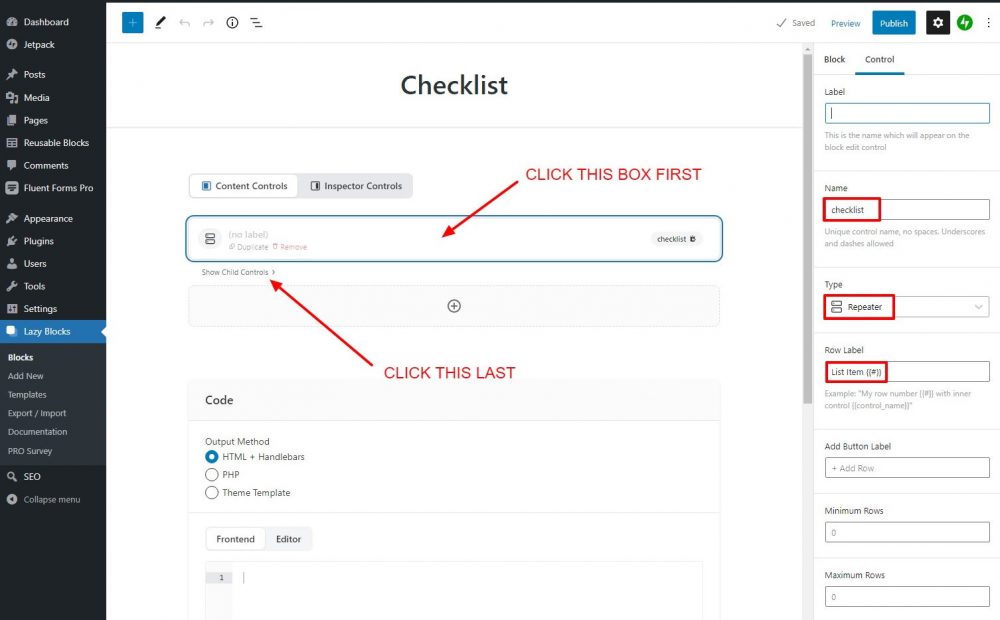
OK, you’ve created the block; now you need to create the repeater:
- Click the plus sign to add a Control and click on it to select it.
- In the right column, leave Label blank and enter “checklist” for Name.
- Below that, for Type, select “Repeater”.
- Below that, for Row Label, enter “List Item {{#}}”.
- Below that, for Collapsible Rows, select “No”. Leave the rest of the items in their default values.
- Back to the main section, click “Show Child Controls”.
Creating the List Items
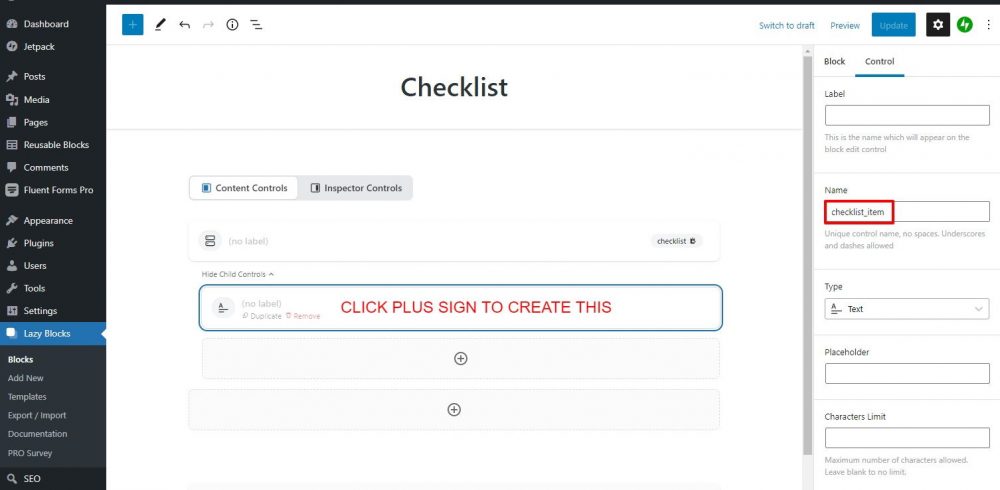
You have the repeater, now you need to create the individual list items in the repeater:
- Click the plus sign under the Repeater to create a field inside the Repeater.
- In the right column, leave the Label blank. For the Name in the right column, enter “checklist_item”.
Adding the Template Code
The block is created, but no front end code is output until you add this template code:
- In the Code section, select “PHP”.
- For the Frontend code, paste in the following:
<ul class="lazy-block-checklist">
<?php foreach( $attributes['checklist'] as $inner ): ?>
    <li>
      <label><input type="checkbox"> <div class="label"><?php echo $inner['checklist_item']; ?></div></label>
    </li>
<?php endforeach; ?>
</ul>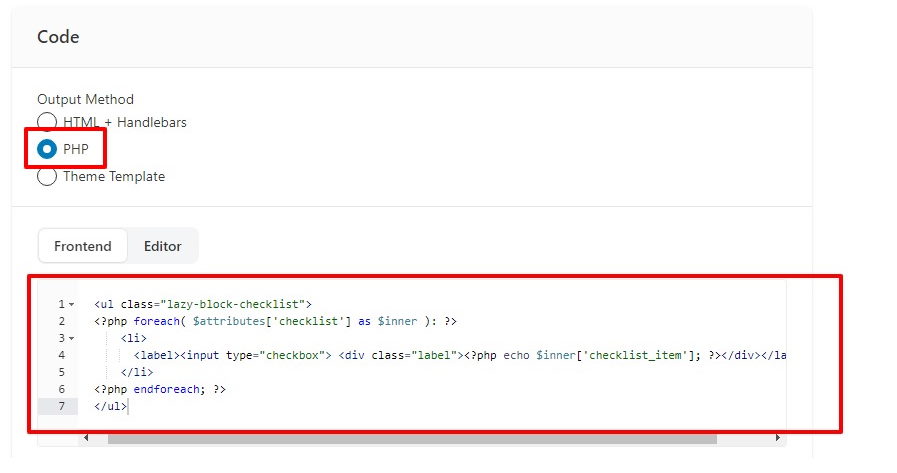
Go ahead and publish your block! Now, if you go into the Gutenberg editor, you should be able to add the “Checklist” block and add checklist items by pressing the “+ Add Row” button! If not, go back and check your work.
Styling the Checklist
We aren’t done yet because if you look at the front end, the checklist will look pretty bad. We need to get rid of the bullet points and do some other things.
So, copy this CSS into your Customizer or child theme CSS file:
/* LAZY BLOCK CHECKLIST */
ul.lazy-block-checklist {
	margin-bottom: 1em !important;
	padding-left: 20px;
	margin-left: 0px;
}
ul.lazy-block-checklist li {
	list-style: none;
	font-size: large;
	margin-bottom: 1em;
}
ul.lazy-block-checklist li label {
	cursor: pointer;
	user-select:none;
	font-weight: bold;
}
ul.lazy-block-checklist li input {
	width: 22px;
	height: 22px;
	vertical-align: top;
	margin-right: 10px;
	cursor: pointer;
}
ul.lazy-block-checklist li label .label {
	display: inline-block;
	width: calc(100% - 50px);
}
ul.lazy-block-checklist li .label div {
	font-weight: normal;
}
This should make your checklist look a lot better, although it might not be perfect depending on your theme.
Make sure to check on mobile. If your labels are falling below the checkboxes, adjust the width of the .label div by increasing the 50px value in this line: “width: calc(100% – 50px);”
Finished Examples
Check out this travel checklist, this day hike checklist, or this website pre-launch checklist.
Improvements
When I posted this article on Facebook, several folks suggested adding local storage. That wouldn’t be too hard, but for my applications such as my travel checklist, it wasn’t needed, as the list would only be used for one session and not needed two weeks later or whatever. I leave it as an exercise for the reader to implement if needed.
Also, you can make the rendered checklist appear in the Gutenberg editor with some more settings in Lazy Blocks and by adding the CSS to the admin. Another exercise for the reader!
I hope this was helpful. Did it work for you? Any questions? Let me know in the comments below! – Brian

I am a freelance web developer and consultant based in Santa Monica, CA. I’ve been designing websites using WordPress and from scratch using HTML, CSS, PHP, and JavaScript since 2010. I create websites and web applications for businesses, nonprofits, and other organizations. I have a degree in Electrical Engineering (BSEE) from California Institute of Technology and a degree in Engineering Management (MSEM) from Stanford University.
Please Leave a Question or Comment